Creating a New Job
To create a new job, simply press the "New Job" button to start the New Job Wizard. The wizard will guide you through the Job creation process, allowing you to view and enter the most commonly used features for a particular Job type. To enter additional information or to view the full features of the PDF Automation Server Job properties, select the Edit Job properties check box on the Output Page at the end of the wizard.
Note: At each step the wizard will check to make sure that all fields have been correctly filled out and you will be prevented from going to the next step until all options validate correctly.
How to Create a New Job
Step 1: Select a job
Select the Job Type and some initial settings for the new job you wish to create.
Job Types: Use this list to choose the type of job that you would like to create.
Name: Enter a descriptive name for the job.
Delay: Enter the approximate delay (in seconds) between each scan of the source directory.
Source: Choose whether you want to monitor/watch a folder, email account, or ftp server for incoming files.
Watch a local folder for files: Choose the local directory to watch for files
Note: This directory is local to where the server is running not the PAS Manager and so the file path must follow the format set by the OS of the server.
Watch an FTP server for files: Set the FTP settings for the folder to watch
- FTP Server: the URL of the FTP server
- Path: the directory on the FTP server to watch for files
- User: the user name to access the server
- FTP Password: the password for the user set above
Check E-mail for attached files: Set the settings for the email address to check for file attachments. These settings will need to be obtained from your email service provider.
- Server Name: The email server name
- Server Type: POP3 or IMAP
- SSL: Check if the server requires SSL encryption
- Recipient: the email address used to access the server
- Email Password: the password for the user set above
Password: Enter a password to use when opening any source PDF documents that are password protected
Step 2: Store the Original File
Select the options for storing the original files. Using the New Job Wizard, the available options include saving a the file to a folder and posting the file using FTP.
Save the File to a Folder: Select the local folder to store the original files
Note: This directory is local to where the server is running not the PAS Manager and so the file path must follow the format set by the OS of the server.
Post the file using FTP: Set the FTP server options to store the original files
- FTP Server: the URL of the FTP server
- Path: the directory on the FTP server to watch for files
- User: the user name to access the server
- FTP Password: the password for the user set above
Step 3: Job specific settings
This screen allows you to set some basic settings for the job selected in Step 1.
- Add Headers
& FootersAdd Headers
& Footers
The Add Header and Footer Job is used to add headers and footers to PDF files. The wizard allows to create a simple header or footer that is centered horizontally on PDF documents pages.
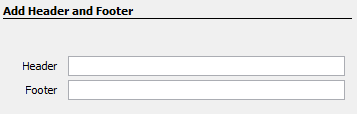
Header - Enter the text to be used for a centered header.
Footer - Enter the text to be used for a centered footer.
See Add Headers and Footers which offers more options than the Wizard.
- Add WatermarksAdd Watermarks
The Add Watermark Job is used to add text or image watermarks to PDF files. The wizard allows you to create a simple watermark from text or an image file centered on the PDF document. Edit the job properties to see additional settings.
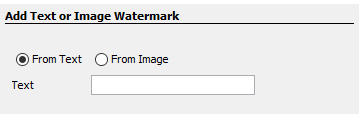
You have the option to add either a text or image watermark to the document. The options will change based on whether or not text or image is selected.
Text Watermark Options
Text - Enter the text to be displayed on the watermark. By default this text will be at a 45 degree angle centered on the page
Image Watermark Options
File – the full path to the image file on the server to watch for files. Accepted formats are jpg, png, gif, & tiff.
Note: This directory is local to where the server is running not the PAS Manager and so the file path must follow the format set by the OS of the server.
See Add Watermarks which offers more options than the Wizard.
- Clear SecurityClear Security
The Clear Security Job is used to remove permissions and passwords in PDF files. This Job is very simple as there are no options on how to clear the security. After the security is cleared, there are options for routing of the output file after optionally changing its name. The tab has the following sections:
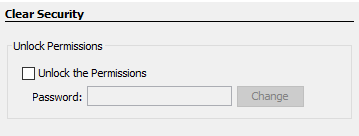
Unlock Permissions - Use this section to enter a password to open the document if the document is password protected. If the document is not password protected, leave this section un-selected.
See Clear Security which offers more options than the Wizard.
- Convert
Excel DocumentsConvert
Excel Documents
The Convert Excel to PDF job allows to convert Microsoft® Excel documents to PDF. The basic wizard options allow to set the security options on the output PDF document.
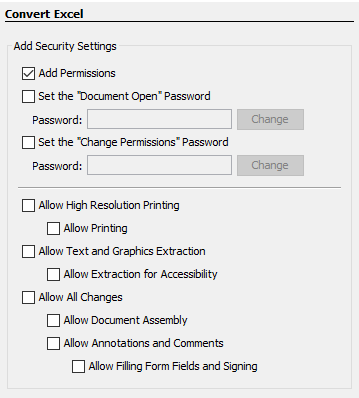
Add Permissions
Set the "Document Open" Password – also known as the user password, it is the password that will be required when the documents are opened.
Set the "Change Permissions" Password – also known as the owner password, it is the password that will be required when trying to change permissions and passwords on the documents.
Allow High Resolution Printing – Print the document at high resolution. When this permission is granted, the following permission 'Printing' is also automatically granted.
Allow Printing - Allow printing the document
Allow Text & Graphics Extraction – Copy or otherwise extract text and graphics from the document. When this permission is granted, the following permission 'Extraction for Accessibility' is also automatically granted.
Allow Extraction for Accessibility – Extract text and graphics in support of accessibility to disabled users or other purposes
Allow Document Changes – Modify the document. When this permission is granted, the following 3 permissions (Document Assembly, Comments and Form Filling) are also automatically granted. When this permission is not granted, the following 3 permissions (Document Assembly, Comments and Form Filling) can independently be granted.
Allow Document Assembly – Assemble the document: insert, rotate or delete pages and create bookmarks or thumbnail images
Allow Annotations & Comments – Add or modify text annotations. When this permission is granted, the following permission 'Filling Form Fields & Signing' is automatically granted. When this permission is not granted, then the following permission 'Form Filling & Signing' can be granted independently. And when this permission is granted and the 'All Changes' permission is also granted, creating or modifying interactive form fields (including signature fields) is allowed.
Allow Filling Form Fields & Signing - Fill in existing interactive form fields including signature fields.
See Convert Excel to PDF which offers more options than the Wizard to export files to images or send them to the printer
- Convert
PDF to Convert
PDF to HTML5
The Convert To HTML5 tab allows the user to set options when converting a PDF document to either an SVG document or an HTML wrapped around the SVG.
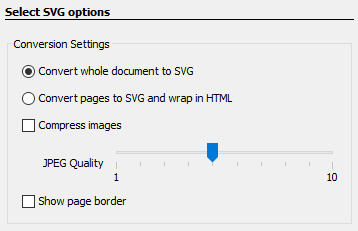
Conversion Settings
Convert whole document to SVG - converts the PDF document to a single .svg file
Convert pages to SVG and wrap in HTML - converts the PDF document to an SVG image and then wraps the image in HTML so that it can be displayed in any we browser
Compress Images - will convert images to JPEG lossy compression that will reduce image quality and size
JPEG quality - This is the quality of JPEG compression. It varies from 0 (very high compression, very low quality), to 10 (low compression, very high quality) based on the quality parameter. Some guidelines for the quality value: 8 high quality, 5 medium quality, 2 low quality.
Show page border - adds a single pixel black border on the PDF page.
See Convert to HTML5 which offers more options than the Wizard.
- Convert
PDF to ImagesConvert
PDF to Images
The Convert to Images Job is used to convert the pages of a PDF document to a series of images.
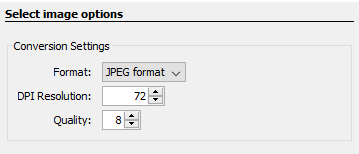
Conversion Settings
Format - The image format used when converting the PDF documents to images
JPEG - lossy compression that will reduce image quality and size
- Quality: This is the quality of JPEG compression. It varies from 0 (very high compression, very low quality), to 10 (low compression, very high quality) based on the quality parameter. Some guidelines for the quality value: 8 high quality, 5 medium quality, 2 low quality.
- Extension: Choose to save the file as either .jpeg or .jpg
PNG - Lossless compression does not reduce quality and has no additional options
TIFF - Lossless compression does not reduce quality but allows for more than one image per file and additional compression formats
- Compression: Select the specific compression type for the TIFF image. The available TIFF compressions are: CCITT_RLE(B&W), Group 3 Fax (B&W), Group 4 Fax (B&W), Pack Bits, LZW, ZLib, Deflate, JPEG, No Compression.
- One TIFF Per Page: By default TIFF images will be created into a single file containing multiple images. Check this option to instead generate a separate TIFF image for each page.
See Convert to Images which offers more options than the Wizard.
- Convert
PDF to PDF/AConvert
PDF to PDF/A
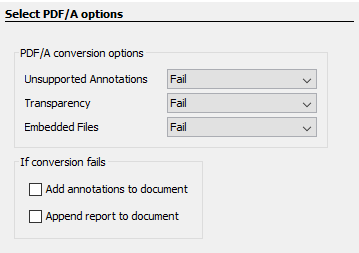
The Convert to PDF/A job allows you to convert PDF documents to the PDF/A sub-format for archiving. The basic wizard options allow to set some options when converting PDF to PDF/A. Edit the job properties to see additional settings.
Profile
Select the PDF/A format you wish to convert the documents too. For more details on each of the formats see Convert PDF to PDF/A
PDF/A-1b: Use of PDF 1.4
PDF/A-2b: Use of ISO 32000-1
PDF/A-3b: Use of ISO 32000-1 with support for embedded files
PDF/A conversion options
Unsupported Annotations - Choose whether to "Delete" any unsupported annotations or to "Fail" (i.e. do not convert the original PDF to PDF/A).
Transparency - Choose whether to "Remove" any transparency in the document or to "Fail" (i.e. do not convert the original PDF to PDF/A).
Embedded Files - Choose whether to "Delete" any embedded file in the document or to "Fail" (i.e. do not convert the original PDF to PDF/A).
If conversion fails
Use this section to set the settings to apply when the conversion of the document to PDF/A fails:
Add annotations to document - Check this box to add annotations when there were specific issues with the document that prevented it from being converted to PDF/A.
Append report to document - Choose this box to add a report at the end of the document with issues that prevented it from being converted to PDF/A.
See Convert PDF to PDF/A which offers more options than the Wizard.
- Convert
Text to PDFConvert
Text to PDF
This job is used to convert text documents to PDF. The basic wizard options allow to define the formatting of the new PDF document:
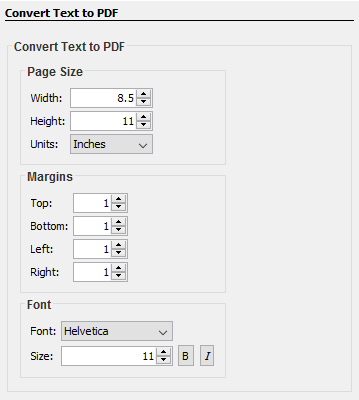
Page Size
Width - The width of the newly created PDF document
Height - The height of the newly created PDF document
Units - Units to use when calculating the position of the header and footer. This can be inches, points, centimeters, or millimeters. Points are calculated in the PDF standard, 72 points per inch.
Margins
Top - The distance of the margin from the top
Bottom - The distance of the margin from the bottom
Left - The distance of the margin from the left
Right - The distance of the margin from the right
Font
Font - The font for the header and footer
Font Size - The font size for the header and footer
B - Makes all of the text Bold
I - Makes all of the text Italic
See Convert Text to PDF which offers more options than the Wizard.
- Convert
Word DocumentsConvert
Word Documents
The Convert Word to PDF job allows to convert Microsoft® Word documents to PDF. The basic wizard options allow to set the security options on the output PDF document.
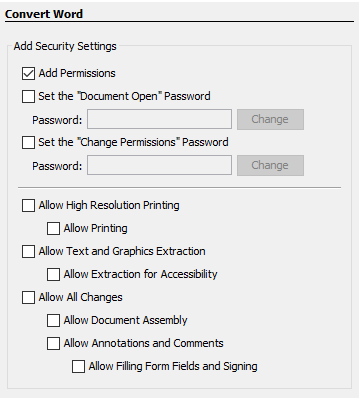
Add Permissions
Set the "Document Open" Password – also known as the user password, it is the password that will be required when the documents are opened.
Set the "Change Permissions" Password – also known as the owner password, it is the password that will be required when trying to change permissions and passwords on the documents.
Allow High Resolution Printing – Print the document at high resolution. When this permission is granted, the following permission 'Printing' is also automatically granted.
Allow Printing - Allow printing the document
Allow Text & Graphics Extraction – Copy or otherwise extract text and graphics from the document. When this permission is granted, the following permission 'Extraction for Accessibility' is also automatically granted.
Allow Extraction for Accessibility – Extract text and graphics in support of accessibility to disabled users or other purposes
Allow Document Changes – Modify the document. When this permission is granted, the following 3 permissions (Document Assembly, Comments and Form Filling) are also automatically granted. When this permission is not granted, the following 3 permissions (Document Assembly, Comments and Form Filling) can independently be granted.
Allow Document Assembly – Assemble the document: insert, rotate or delete pages and create bookmarks or thumbnail images
Allow Annotations & Comments – Add or modify text annotations. When this permission is granted, the following permission 'Filling Form Fields & Signing' is automatically granted. When this permission is not granted, then the following permission 'Form Filling & Signing' can be granted independently. And when this permission is granted and the 'All Changes' permission is also granted, creating or modifying interactive form fields (including signature fields) is allowed.
Allow Filling Form Fields & Signing - Fill in existing interactive form fields including signature fields.
See Convert Word to PDF which offers more options than the Wizard to export files to images or send them to the printer
- Crop PagesCrop Pages
The Crop/Resize Pages Job is used to crop PDF documents. The wizard has options to modify the Crop, Trim, Bleed, and Art boxes and to also specify the page range that should be modified.
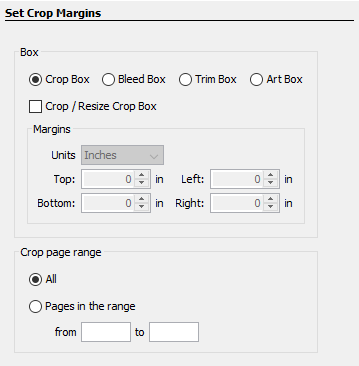
Box
Crop box – the region to which the contents of the page are to be or cropped when displayed or printed.
Bleed box – the bounds to which the contents of the page should be clipped when output in a production environment.
Trim box – the intended dimensions of the finished page after trimming.
Art box – the extent of the page’s meaningful content (including potential white space) as intended by the document creator.
Margins
Units - Select the measurement unit for the crop margins in either Inches, Points, Centimeters, or Millimeters
Top - The distance of the margin from the top
Bottom - The distance of the margin from the bottom
Left - The distance of the margin from the left
Right - The distance of the margin from the right
Crop Page Range
All - Converts all the pages of the document
Pages in the range - Converts only the pages in the designated range (if the pages exist)
See Crop Page Job which offers more options than the Wizard.
- Custom JobCustom Job
The Custom Job allows you to define your own workflow with all the flexibility provided by Java programming language. Custom jobs also give access to all the advanced PDF functions available in Qoppa’s jPDFProcess PDF library making it possible to inspect or manipulate the PDFs as part of the process.
PDF Automation Server Custom Job API
How to Define your Own Custom Job
Defining your own custom job will require some programming in Java. After creating the Custom Job using the Job Creation Wizard, you will need to edit the job properties and use built in code editor to define the job.
To get you started, follow the link below to our knowledgebase with examples of implementations of custom processes:
PDF Automation Server Custom Job Examples
Note: More custom process samples will be added to the knowledgebase to show how the concept can be extended to process PDF documents based on anything in the documents including Metadata or document info, form field data, text content, security or digital signatures contained in the PDF.
- Digitally
Sign PDFDigitally
Sign PDF
The Sign PDF Job is used to digitally sign PDF documents as they are received. The Digital Signature wizard options are used to enter the settings for signing the documents:
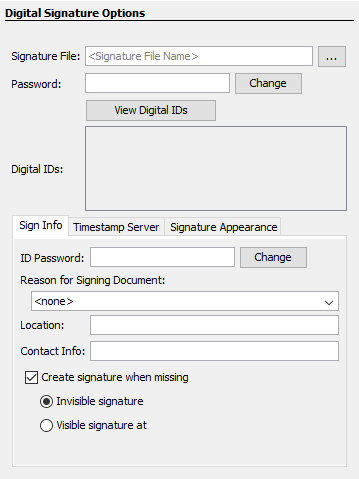
Signature File - The full path to the Digital ID file used in the signature on the server. Accepted formats are .p12 & .pfx.
Note: This directory is local to where the server is running not the PAS Manager and so the file path must follow the format set by the OS of the server.
Password - The password needed to open the Digital ID file
View Digital IDs - When clicked will display the Digital IDs stored within the file
Digital IDs - Displays a list of all the digital IDs stored within the signature file
Signature Information
ID Password - The password for the selected digital ID. You must enter the correct password in order to be able to digitally sign the document
Reason for Signing Document - Select a reason the document was signed from the list from the below options
- I approve this document
- I am the author of this document
- I have reviewed this document
- I attest to the accuracy and integrity of this document
- I agree to the terms defined by this document
Location - Enter additional location details
Contact Information - Enter additional contact information for the signature
Create signature when missing - Check this option to create a signature even if there is no signature field present in the document
Create invisible signature - will create an invisible signature within the document
Create visible signature at - will create a signature at the location specified below
- X: the "X" location of the top left corner of the signature
- Y: the "Y" location of the top left corner of the signature
- Width: the width in pixels of the signature
- Height: the height in pixels of the signature
- Page: the page to place the signature in the document. You can set the First Page, Given Page, or Last Page.
Timestamp Server
Use Timestamp Server - the URL of the timestamp server
TSA Requires Authentication - check this box if the server requires authentication
User name - the user name for authentication on the timestamp server
Password - the password for authentication on the timestamp server
Signature Appearance
Image
Show Image - When checked an image can be added to the background of the digital stamp appearance
Transparency - Transparency setting for the image
File - The full path to the image file used in the signature on the server. Accepted formats are jpg, png, gif, & tiff.
Note: This directory is local to where the server is running not the PAS Manager and so the file path must follow the format set by the OS of the server.
Align - Allows you to align the image on the left, center, or right of the signature
Text
Show - The options below, when checked, set which digital signature properties will be displayed on the signature
- Name: The large text that will display the name
- Digitally signed by: Adds the text "Digitally signed by" before the Common Name
- Date: Date the signature was completed
- Common Name: The name associated with the digital ID
- Organizational Unit: The organizational unit associated with the digital ID
- Organization Name: The organization name associated with the digital ID
- Locality/City: the locality/city associated with the digital ID
- State: The state associated with the digital ID
- Country: The country associated with the digital ID
- Email: The email associated with the digital ID
Orientation - Sets the digital signature text to be displayed with one of two options
- Left to Right: Displays the Name on the left and all other properties in smaller text on the right
- Right to Left: Displays the Name on the right and all other properties in smaller text on the left
See Digitally Sign PDF which offers more options than the Wizard.
- Edit Document
PropertiesEdit Document
Properties
The Edit Document Properties Job is used to modify the document property information. The options available when editing document properties are as follows:
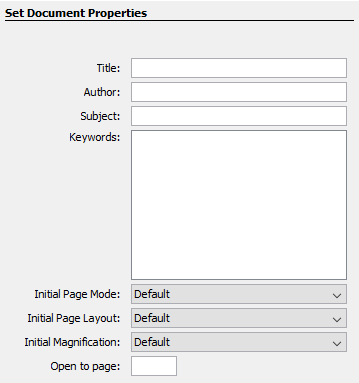
Title - Displays the current Title of the document. Can also be edited if desired
Author - Displays the current Author of the document. Can also be edited if desired
Subject - Displays the current Subject of the document. Can also be edited if desired
Keywords - Displays the current Keywords of the document. Can also be edited if desired
Initial Page Mode - Sets the default behavior for the navigation tab when the document is opened
- Default: Uses the default settings for the application the document is opened in
- Page Only: No navigation tab will be displayed
- Bookmarks Panel and Page: Displays the bookmarks panel when the document is opened
- Pages Panel and Page: Displays the pages panel when the document is opened
- Attachments Panel and Page: Displays the attachments panel when the document is opened
- Full Screen Mode: Displays the document in full screen mode when opened
Initial Page Layout - Sets the default behavior for the page layout when the document is opened
- Default: Uses the default settings for the application the document is opened in
- Single: Displays only a single individual page at a time
- Single Continuous: Displays all of the document's pages in a single column that can be continuously scrolled
- Facing: Displays only two pages at a time side by side with odd pages on the left and even pages on the right
- Facing Continuous: Displays all of the documents pages in two columns with odd pages on the left and even pages on the right
Initial Magnification - Sets the default magnification for the document when opened
- Default: Uses the default settings for the application the document is opened in
- Actual Size: Displays the document with a 1:1 ratio to match how the document would look if printed without any scaling
- Fit to Page: Scales the view to fit the width of the document in the PDF viewer frame
- Fit to Width: Scales the view to fit the entire document within the PDF viewer frame
- %: Sets the zoom to the specified number value
Open to Page - Sets the page number to be displayed when the document is opened
See Edit Document Properties which offers more options than the Wizard.
- Export
AnnotationsExport
Annotations
The Export Annotations Job is used to extract annotations from PDF documents. The options available when extracting annotations are as follows:
Export Format - Choose the export format (.fdf, .xfdf)
FDF: File format created by Adobe that is supported by most PDF applications
XFDF: Extended FDF file format created by Adobe that is supported by most PDF applications
See Export Annotations which offers more options than the Wizard.
- Export
Field ValuesExport
Field Values
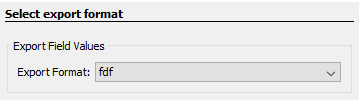
The Export Field Values Job is used to extract field values from interactive PDF forms. The options available when extracting field values are as follows:
Export Format - Choose the export format (.fdf, .xfdf, .xdp, .xml)
FDF: File format created by Adobe that is supported by most PDF applications
XFDF: Extended FDF file format created by Adobe that is supported by most PDF applications
XDP: An XML Data package created by Adobe that is supported by most PDF applications
XML: File format that is similar to an Excel file that will contain all of the annotation information
Use field value as filename - Check this option if you wish to use a value from a field within the document to name the exported file
Field - The EXACT name of the field to use for the filename
See Export Field Values which offers more options than the Wizard.
- Extract
TextExtract
Text
The Extract Text Job is used to extract text from PDF documents to text files. The options available when extracting text are as follow:
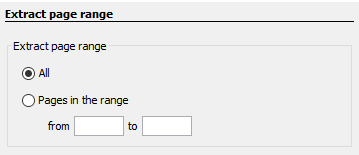
Extract Page Range - Use this section to specify the range of pages text will be extracted from.
All - Converts all the pages of the document
Pages in the range - Converts only the pages in the designated range (if the pages exist)
See Extract Text which offers more options than the Wizard.
- Flatten
AnnotationsFlatten
Annotations
The Flatten Annotations Job is used to flatten annotations in PDF documents. The options available when flattening fields are as follow:
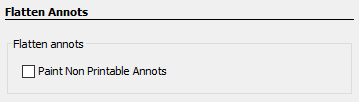
Paint Non Printable Annotations - Check this box to paint non-printable annotations in the output flattened PDF document. Non-printable annotations are those with the "Printable" flag set to false or visibility set to "Show/Do not Print".
Note: There are specific types of annotations that will never be flattened:
- Redaction Annotations (the markings before redactions are applied)
- Links
- File Attachment Annotations
- Sound Annotations
See Flatten Annotations which offers more options than the Wizard.
- Flatten
FieldsFlatten
Fields
The Flatten Fields Job is used to flatten fields in PDF interactive forms. The option available when flattening fields are as follow:

Paint Buttons - Check this option to paint form field buttons directly on the document.
Paint Non Printable Fields- Check this box to paint non-printable fields in the output flattened PDF document. Non-printable fields are those with the "Printable" flag set to false or visibility set to "Show/Do not Print".
See Flatten Fields which offers more options than the Wizard.
- Import
AnnotationsImport
Annotations
The Import Annotations Job is used to add annotations to a PDF. The options available when importing annotations are as follows:

Annotations File - The full path to the annotations file used to import to the PDFs on the server. Accepted formats are .fdf & .xfdf
Note: This directory is local to where the server is running not the PAS Manager and so the file path must follow the format set by the OS of the server.
See Import Annotations which offers more options than the Wizard.
- Import
Field ValuesImport
Field Values
The Import Field Values Job is used to merge form data with a specific interactive PDF form set in the job settings. The options available when importing field values are as follows:
- Import Field Values - Merge PDF - Enter the path to the source PDF form that the fields values should be imported to.

Merge PDF - The full path to the source PDF form that the fields values should be imported to.
Note: This directory is local to where the server is running not the PAS Manager and so the file path must follow the format set by the OS of the server.
See Import Fields which offers more options than the Wizard.
- Insert
PagesInsert
Pages
The Insert Pages Job is used to insert pages from a specific PDF document into the documents currently being processed. The options available when inserting PDF pages are as follows:
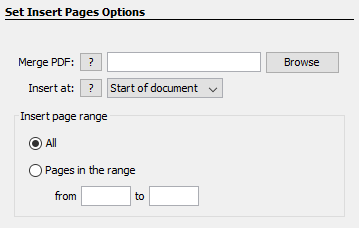
Merge PDF - The full path to the source PDF form that you wish to insert pages from.
Note: This directory is local to where the server is running not the PAS Manager and so the file path must follow the format set by the OS of the server.
Insert at - Specifies where to insert the pages of the Merge PDF in the document that is processed.
- Start of document: inserts the pages from the Merge PDF in the beginning of the document
- End of document: inserts the pages from the Merge PDF in the end of the document
- After page: inserts the pages from the Merge PDF after a designated page number
Insert Page Range
Use this section to specify the pages from the Merge PDF to insert into the PDF documents being processed.
Extract Range - Use this section to specify which pages from the merge document to insert.
All - inserts all pages from the merge document into the PDF
Pages in the range - inserts only the pages in the designated range (if the pages exist)
See Insert Pages which offers more options than the Wizard.
- Move Files
with No ProcessingMove Files
with No Processing
The Move Files Job is used to move files that require no PDF specific processing. There is no information that can be entered in the wizard. Create the new Job then Edit the Job Properties to view the available options for this Job type.
- Optimize
PDFOptimize
PDF
The Optimize PDF Job is used to reduce PDF file size. The wizard will create an optimize PDF job that uses standard default optimization options. There are no specific options to enter in the wizard, the standard optimization options below are automatically set when created but can be edited through the job properties if needed.
- Color Images
- Compression = JPEG - Quality = 5
- DPI = 150
- Grayscale Images
- Compression = JPEG - Quality = 5
- DPI = 150
- B&W Images
- Compression = JBIG2
- DPI = 300
- Object Removal
- Alternate Images, Unused Resources, Embedded Thumbnails
- Other
- Flatten All Comments, Flate Uncompressed Streams, Merge Duplicate Images, Merge Duplicate Fonts
See Optimize PDF to edit specific optimization options.
- PreflightPreflight
This job is used to verify document compliance PDF/X standards. The options available for this job are:
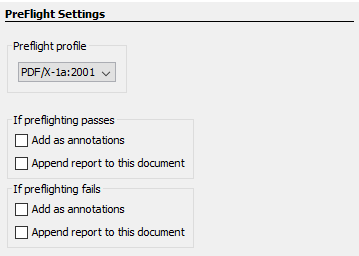
Preflight Profile - Select the standard that you wish to verify
- PDF/X-1a:2001 - ISO 15930-1
- PDF/X-1a:2003 - ISO 15930-4
- PDF/X-3:2002 - ISO 15930-3
- PDF/X-3:2003 - ISO 15930-6
- PDF/A-1b - ISO 19005-1 Level B
If Preflighting Passes
Determines what happens to the document if it passes the selected Preflight Profile.
Result Options
- Add as annotations: When checked, will add an annotation for each preflight error with the details of the error in the annotation comment
- Append report to this document: When checked, appends a Preflight Results report to the end of the document
If Preflighting Fails
Determines what happens to the document if it fails the selected Preflight Profile.
Note: This only applies to failing preflighting specifically. Any issues that fail being processed or preflighted will use the settings set in the Trouble Handling tab.
Result Options
- Add as annotations: When checked, will add an annotation for each preflight error with the details of the error in the annotation comment
- Append report to this document: When checked, appends a Preflight Results report to the end of the document
See Preflight which offers more options than the Wizard.
- Print PDF
FilesPrint PDF
Files
The Print PDF Job is used to send PDF documents to a printer as they are received. The options allow the user to set different job properties such as choosing the printer to send the document to, setting page ranges and more:
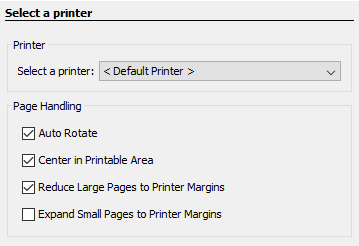
Select a Printer - Select the printer you wish to use here. When the job is running and the printer you selected now is not available, then the current system default printer will be selected instead.
Page Handling
Auto Rotate: rotate the printout to match the width and length with the paper. The portrait / landscape setting set by the user will be ignored.
Center In Printable Area: center the page in the paper. No effect if the pages in a document are larger than the paper they are being printed on.
Reduce Large Pages to Printer Margins: shrink pages so that they fit in the paper. No effect if the pages in a document are smaller than the paper they are being printed on.
Expand Small Pages to Printer Margins: expand pages to fill the paper they are being printed on. No effect if the pages in a document are larger than the paper they are being printed on.
See Print PDF Files which offers more options than the Wizard.
- Recognize
Text Using Recognize
Text Using OCR
The Recognize text using OCR job allows to recognize and add text into scanned PDF documents.
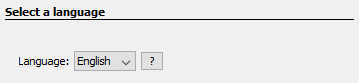
Language - Select the language to use when recognizing text.
See Recognize Text Using OCR which offers more options than the Wizard.
- Set Passwords
& PermissionsSet Passwords
& Permissions
The Change Permissions Job is used to set the permission settings of a PDF file. This wizard allows you to set the following options for the permissions.
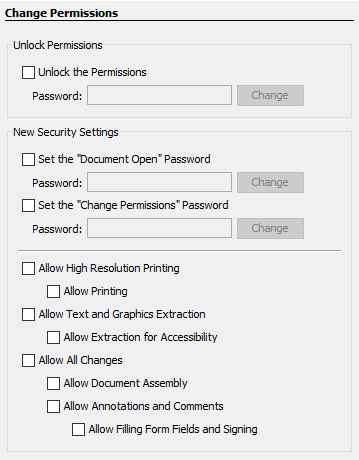
Unlock the Permissions
Use this section to set the passwords to try when unlocking the permissions before setting the new permission settings.
Passwords to Try: To set a password click in the password field or on the Edit button. Then enter the password you want to be used. Do this for up to four passwords to try on password protected PDFs during the process.
New Security Settings
Compatibility
Compatibility - Sets the compatibility for the PDF security in the converted document. The options are either Acrobat 5.0 (High 128-bit RC4) and later or Acrobat 7.0 (High 128-bit AES) and later.
Security for Document
Set the "Document Open" Password – also known as the user password, it is the password that will be required when the documents are opened.
Security for Permissions
Set the "Change Permissions" Password – also known as the owner password, it is the password that will be required when trying to change permissions and passwords on the documents.
Permissions
Allow High Resolution Printing – Print the document at high resolution. When this permission is granted, the following permission 'Printing' is also automatically granted.
Allow Printing - Allow printing the document
Allow Text & Graphics Extraction – Copy or otherwise extract text and graphics from the document. When this permission is granted, the following permission 'Extraction for Accessibility' is also automatically granted.
Allow Extraction for Accessibility – Extract text and graphics in support of accessibility to disabled users or other purposes
Allow Document Changes – Modify the document. When this permission is granted, the following 3 permissions (Document Assembly, Comments and Form Filling) are also automatically granted. When this permission is not granted, the following 3 permissions (Document Assembly, Comments and Form Filling) can independently be granted.
Allow Document Assembly – Assemble the document: insert, rotate or delete pages and create bookmarks or thumbnail images
Allow Annotations & Comments – Add or modify text annotations. When this permission is granted, the following permission 'Filling Form Fields & Signing' is automatically granted. When this permission is not granted, then the following permission 'Form Filling & Signing' can be granted independently. And when this permission is granted and the 'All Changes' permission is also granted, creating or modifying interactive form fields (including signature fields) is allowed.
Allow Filling Form Fields & Signing - Fill in existing interactive form fields including signature fields.
See Set Passwords & Permissions which offers more options than the Wizard.
- Split PDFSplit PDF
The Split PDF Job is used to split PDF documents into multiple documents as they are received. The options allow to split incoming documents by page count, page range, bookmarks, blank page or search text.
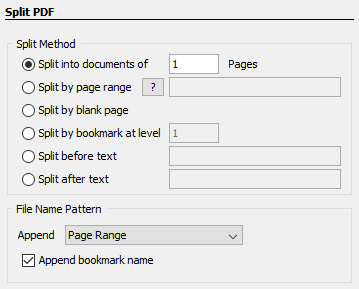
Split Method
Use this section to tell PAS how to split the document into multiple documents. The available options in this section are:
Split into documents of - Use this method to split the document into equal size documents of a given number of pages. Enter the page count in the text field.
Split by page range - Use this method to split the document into multiple documents based on page range. Enter the page range in the text field. Dash is used for a page range, comma to separate pages within the same document, semicolon to separate documents. So for instance, 1, 3-5; 7-10 will output two documents, the first document with pages 1, 3, 4, and 5, and the second document with pages 7, 8, 9, and 10.
Split by blank page - Use this method to split the document when a white page is encountered. The white page will be used as a separator between documents and will be discarded.
Note: If the page was created from a scanned document the page may appear bank but will actually contain a solid white image and so the page is not viewed as blank.
Split by bookmark at level - Use this method to split the document based on bookmarks at level 1. You can also choose to split up to a higher level, for instance up to level 3. In this case, the document will be split at bookmark level 1, level 2, and level 3. In this method, we assume that the bookmarks contain Go To Page actions within the PDF document itself and that the bookmarks have been created in ascending page order.
Split before text - Use this method to split the document when specific text in the document is encountered. When the text is encountered in a page, this page will become the first page of the next document.
Split after text - Use this method to split the document when specific text in the document is encountered. When the text is encountered in a page, this page will become the last page of the document and the following page will become the first page of the next document.
File Name Pattern
Use this section to tell PAS how to name the output PDF files (the PDF documents obtained by splitting the incoming document):
Append - For each output PDF file, you can choose to append the page range or an incremental counter starting at any given number. PAS will start with the original PDF file name.
Note: The original PDF file name can first be altered using the Change the PDF File Name section below).
- Page Range: When selected, PAS will append a string containing the page range. (for example: test_p4-p6.pdf). When the "Split by page range" option is selected, the page range formula will be appended as a string (for example: the page range formula "1,3,5-10" will name the file test_1_3_5-10.pdf).
Note: An underscore character precedes the page range formula and commas are replaced with an underscore character.
- Incremental Counter Starting at: When selected, PAS will append an incremental counter. The counter will be reset for each new incoming PDF file.
Append bookmark name - This option is only available when the "Split by bookmarks" option is selected. This will append the name of the starting bookmark to the output documents names. So for instance if "Cover Page" is the first bookmark name, the first output document will could be named test_p1-p1_CoverPage.pdf. Only letters, numbers, hyphen and underscore characters are preserved in the bookmark name to guarantee that all operating systems will accept this file name. Commas are replaced with an underscore.
See Split PDF which offers more options than the Wizard.
Step 4: Output/Finish options
The final step allows you to set the output folder and also select a printer and printing options for the processed output file. The final option also allows you to start the Job immediately. If not started immediately you will have to start the job manually when ready.
Output File Options
Save the output file to a folder: Set the location to save the output files.
Print the output file: When checked the output file will be printed using the options set
Printer: Select the printer on the attached to the server machine to print from
Note: This list will only display printers attached to the server not the PAS Manager.
Auto Rotate: rotate the printout to match the width and length with the paper.
Center In Printable Area: center the page in the paper. No effect if the pages in a document are larger than the paper they are being printed on.
Shrink Large Pages to Printer Margins: shrink pages so that they fit in the paper. No effect if the pages in a document are smaller than the paper they are being printed on.
Expand Small Pages to Printer Margins: expand pages to fill the paper they are being printed on. No effect if the pages in a document are larger than the paper they are being printed on.
Start the Job
Select this option to immediately start and run the job on the server.